From Standalone to Self-Healing: Building a 3-Node Proxmox HA Cluster
Hey everyone! After introducing my home setup last time, I would like to walk through how I setup my home cluster.
For a home lab, there is absolutely no need to setup an overkill high availability or redundant cluster. But since I host my blog on my machines, I think why not try to maximize its up-time, and try to learn something along the way.
The goal is to take my 3 proxmox machines and join them into a single, cohesive, Hgih Availability (HA) cluster. So that if one machine goes offline for updates, maintenance, or an unexpected failure, the virtual machines and containers running on it will automatically restart on another machine in the cluster. Zero-downtime dreams, here we come!
Step 1: The Network Backbone (VLANs!)
Before we can even think about clustering, we need a rock-solid network foundation.
In a Proxmox cluster, different types of traffic need their own dedicated "lanes" to prevent traffic jams. If your cluster communication (the "heartbeat" that checks if nodes are alive) gets stuck behind a massive storage file transfer, the cluster can mistakenly think a node is dead. This is bad.
To solve this, we use VLANs (Virtual LANs). We'll create separate virtual networks for different purposes, all running over the same physical cable.
Here's the plan for my setup:
- VLAN 10 (192.168.10.0/24): Proxmox Management. This is how I access the web UI and how the nodes talk to the internet.
- VLAN 20 (10.10.20.0/24): Proxmox Cluster. This is a dedicated, high-priority lane exclusively for cluster communication (Corosync).
- VLAN 30 (10.10.30.0/24): Storage Network. For Ceph or NFS traffic. Keeping big storage transfers off the other networks is key for stability.
To configure this, I edited the network settings on each Proxmox node at /etc/network/interfaces. The setup is identical for all three nodes, you just need to change the static IP addresses for each one.
# /etc/network/interfaces

auto lo
iface lo inet loopback

# Physical NIC
# The name "enp1s0" will be from machine to machine
iface enp1s0 inet manual

# The main VLAN-aware bridge
auto vmbr0
iface vmbr0 inet manual
        bridge-ports enp1s0
        bridge-stp off
        bridge-fd 0
        bridge-vlan-aware yes
        bridge-vids 10,20,30,40,50,60 # Any number you want to use from 1 to 4094, or just type in "1-4094"

# Proxmox management interface (VLAN 10)
auto vmbr0.10
iface vmbr0.10 inet static
        address 192.168.10.11/24
        gateway 192.168.10.1

# Proxmox Cluster Communication Interface (VLAN 20)
auto vmbr0.20
iface vmbr0.20 inet static
        address 10.10.20.11/24

# Proxmox Ceph Storage Interface (VLAN 30)
auto vmbr0.30
iface vmbr0.30 inet static
        address 10.10.30.11/24
Step 2: Teaching the Switch About VLANs
Our Proxmox nodes are now sending out traffic with VLAN tags, but the network switch needs to know what to do with them. This requires a managed switch. I'm using a TP-Link TL-SG108PE, but the concepts are the same for UniFi, Netgear, or other brands, though the UI will look different.
The goal is to configure the switch ports connected to the Proxmox servers as Trunk ports. A trunk port can carry traffic for multiple VLANs simultaneously.
Here's how I did it on my TP-Link TL-SG108PE:
- Log in to the switch's web interface (The default ip will be on the switch itself).
- Navigate to the VLAN menu, and then to the 802.1Q VLAN section.
- Create the VLANs: I entered VLAN IDs 10, 20, and 30 and gave them descriptive names.
- Configure Port Tagging: This is the most important part.
- My Proxmox nodes are plugged into ports 1, 2, and 3.
- In the VLAN membership page, for VLANs 10, 20, and 30, I set ports 1, 2, and 3 to be
Tagged. This tells the switch to expect and preserve the VLAN tags for this traffic. - Any other ports, like one for a simple desktop, would be set as
Untaggedfor a specific VLAN (e.g., VLAN 40 for general devices), with itsPVIDalso set to 40.
| VLAN ID | Name | Member Ports | Tagged Ports | Untagged Ports (PVID) |
|---|---|---|---|---|
| 1 | Default | 1-3, 8 | 1, 2, 3, 8 | |
| 10 | Management | 1, 2, 3, 5 | 1, 2, 3 | 5 |
| 20 | HA_Cluster | 1, 2, 3 | 1, 2, 3 | |
| 30 | Ceph_stor | 1, 2, 3 | 1, 2, 3 | |
| 40 | LANs | 1-4, 6, 7 | 1, 2, 3, 4 | 6, 7 |
| 50 | IoT | 1-4 | 1, 2, 3, 4 |
The table above is my exact VLAN table.
- My upstream traffic comes in from port 8, as default untagged vlan 1, it will only reach port 1~3 as those ports are also untagged ports for vlan 1.
- I have port 5 set to untagged vlan 10 port so that I can connect my laptop to the port and reach my proxmox servers when needed.
- Port 4 is for my access point, I can have different ssids for different vlan tag. Generally vlan 40 and 50.
- Port 6 and 7 are for my other devices like my gaming pcs, the traffic is controlled by my OPNsense firewall (I will write a blog post about it in the future)
- PVID has to be set in another menu 802.1Q VLAN PVID Setting. (Again, it may differ for different brand for the switch)
VLAN may be hard to understand at the beginning, but think of it as just a tag on the traffic packets. I setup my proxmox network to use vlan10, it will then send out data packets with vlan10 tag on it. The switch will then try to send the packets to the ports that set to recieve vlan 10, which in my case, is port 1~3 and 5. For untagged port, it means when the packets go through that port has no vlan tag on it, the port will just give it a tag (like 10), and the packet will go to the ports that are vlan 10 aware.
Now, our physical network is properly segmented and ready for the cluster.
Step 3: Setting Up Shared Storage
For High Availability to work, your VM disks need to live on storage that is accessible to all nodes in the cluster. If a node fails, the other nodes need to be able to access the down VM's disk files to restart it.
You have two excellent choices here:
Option A: Ceph (The Hyperconverged Beast)
Ceph is an incredible software-defined storage solution built right into Proxmox. It pools the local disks from your servers into a single, resilient, and distributed storage system. It's "hyperconverged" because your compute and storage run on the same machines.
Use Ceph if: You have at least one spare, unused disk on each of your three Proxmox nodes.
Setup via the Proxmox GUI:
- From the
Datacenterview, select a node and go to the Ceph tab. - Run the installer wizard. Choose the latest version available (e.g., Reef).
- In the configuration step, it is critical to select your dedicated storage network (
10.10.30.0/24) for both the public and cluster networks. This ensures storage traffic stays in its lane. - Once the Ceph services are installed on all nodes, go to each node's
Ceph-> OSD tab. - Click
Create: OSDand select the unused drive on that machine. I used the 256GB SSD on myn100, and the 1TB HDDs on my other two nodes. Proxmox handles all the formatting. (It is best to use the same capacity storage for every machines so when failover/migration occurs, it's enough storage to run VMs from other machines) - Do this for all three nodes. After a few minutes, the Ceph cluster will be healthy and a new storage pool called
ceph-rbdwill appear underDatacenter->Storage. Done!
Option B: NFS (The Simple & Reliable Storage solution)
If you don't have spare drives on every node, or if you already have a NAS, using an NFS share is a fantastic and easy alternative. In my case, I have a TrueNAS VM running on one of my machines with dedicated HDDs passed through to it.
Use NFS if: You have a central NAS (like TrueNAS or OpenMediaVault) or don't have enough spare drives for Ceph. (Although this is not the "true" HA because it is a single point of failure for your storage, but it is a doable secondary solution)
Setup Steps:
- On your NAS: Create an NFS share. Grant read/write access to the management IPs of all your Proxmox nodes.
- In Proxmox: Go to
Datacenter->Storageand clickAdd. SelectNFS. - Fill in the details:
- ID: A name for your storage (e.g.,
truenas_NFS_Storage). - Server: The IP address of your NAS.
- Export: The share path from the NAS.
- Content: Select all the content types you want to store here (Disk images, ISOs, etc.). (well basically, selecting everything is fine)
- ID: A name for your storage (e.g.,
- Click
Add. The NFS share is now mounted and available to all nodes.
Step 4: Forming the Cluster!
The moment of truth! All the prep work leads to this.
Important: Before you start, make sure you can ping each node from the others on BOTH the management network (192.168.10.x) and the cluster network (10.10.20.x).
- Create the Cluster:Log into the web UI of your first node.Go to
Datacenter->Clusterand clickCreate Cluster.Give it a name (e.g.,homelab-cluster).This is the most critical step: From theCluster Networkdropdown, select the dedicated cluster IP for that node (10.10.20.11). Do not use the management network!ClickCreate. - Join the Other Nodes:On the first node, go to
Datacenter->Clusterand clickJoin Information.ClickCopy Information.Now, log into the web UI of your second node.Go toDatacenter->Clusterand clickJoin Cluster.Paste the copied info into theInformationbox.Enter therootpassword for the first node.Ensure the local node's cluster network IP (10.10.20.14) is selected correctly.ClickJoin. The screen will refresh, and you might get logged out. This is normal.Repeat the exact same process for the third node.
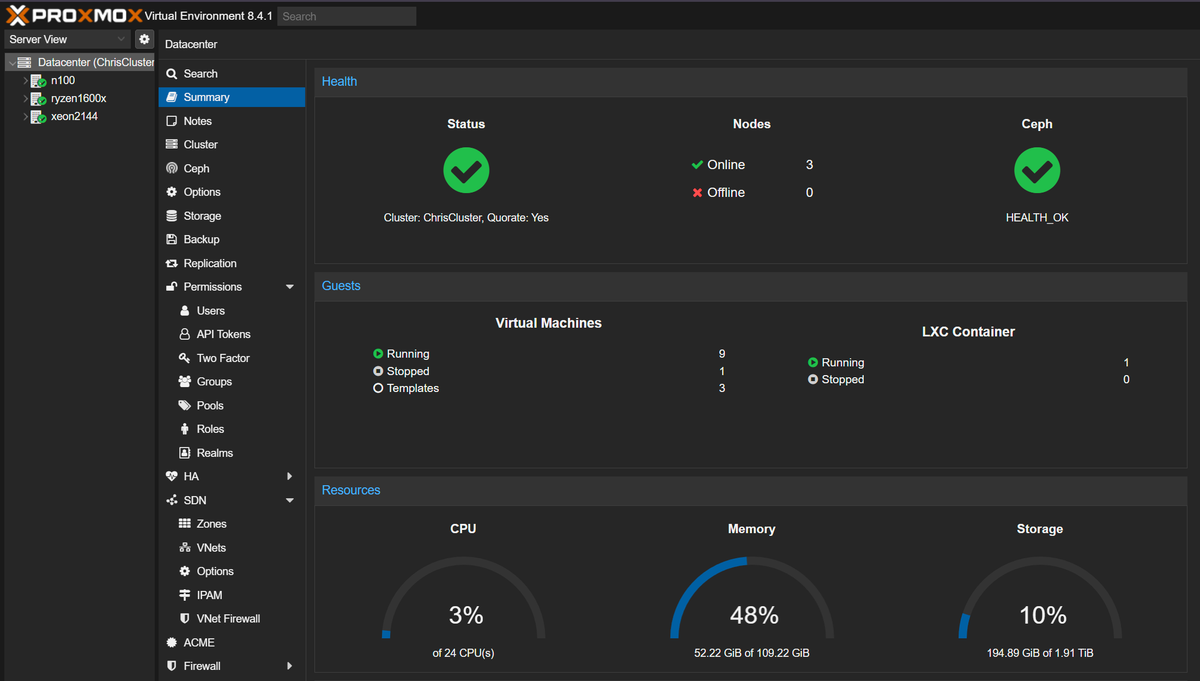
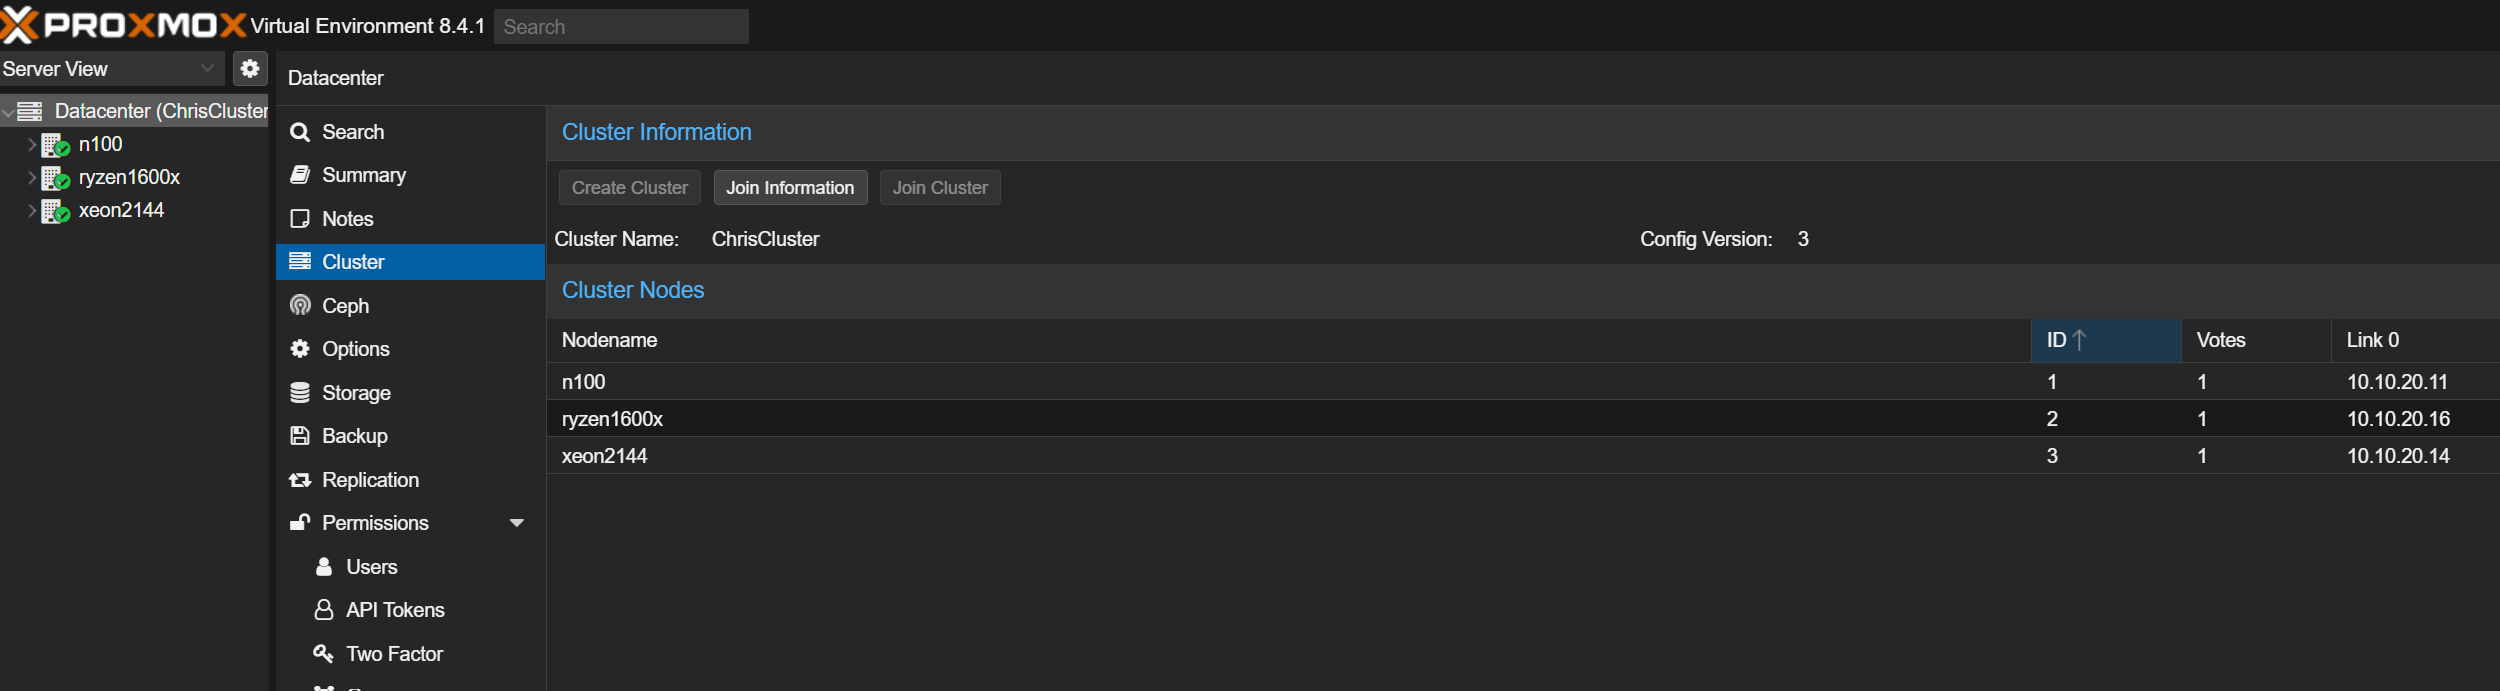
And that's it! Log back into any of the nodes. You should now see all three servers listed in the left-hand pane. At the top, you'll see a Cluster log showing that quorum has been established. You've officially created a Proxmox cluster!
To enable HA for a specific VM, just go to the Datacenter -> HA tab, click Add, and select the VM. Now, if the node that VM is running on goes down, the cluster will automatically start it back up on another node.