Proxmox HA failover failed - "TASK ERROR: no such logical volume"
Running a highly available Proxmox cluster is thrilling, well, only when you have the correct configuration. Recently, I faced a real-world "crash course" in troubleshooting failed High Availability (HA) migrations—the dreaded error:
TASK ERROR: no such logical volume pve/vm-101-disk-0
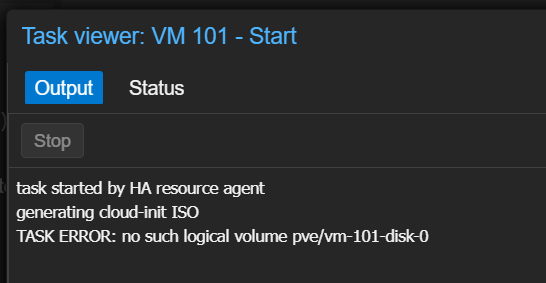
If you have a proxmox cluster and have HA setup for your vms, and got this message when a vm tried to failover, that means you have encountered the same problem as me.
Root Cause
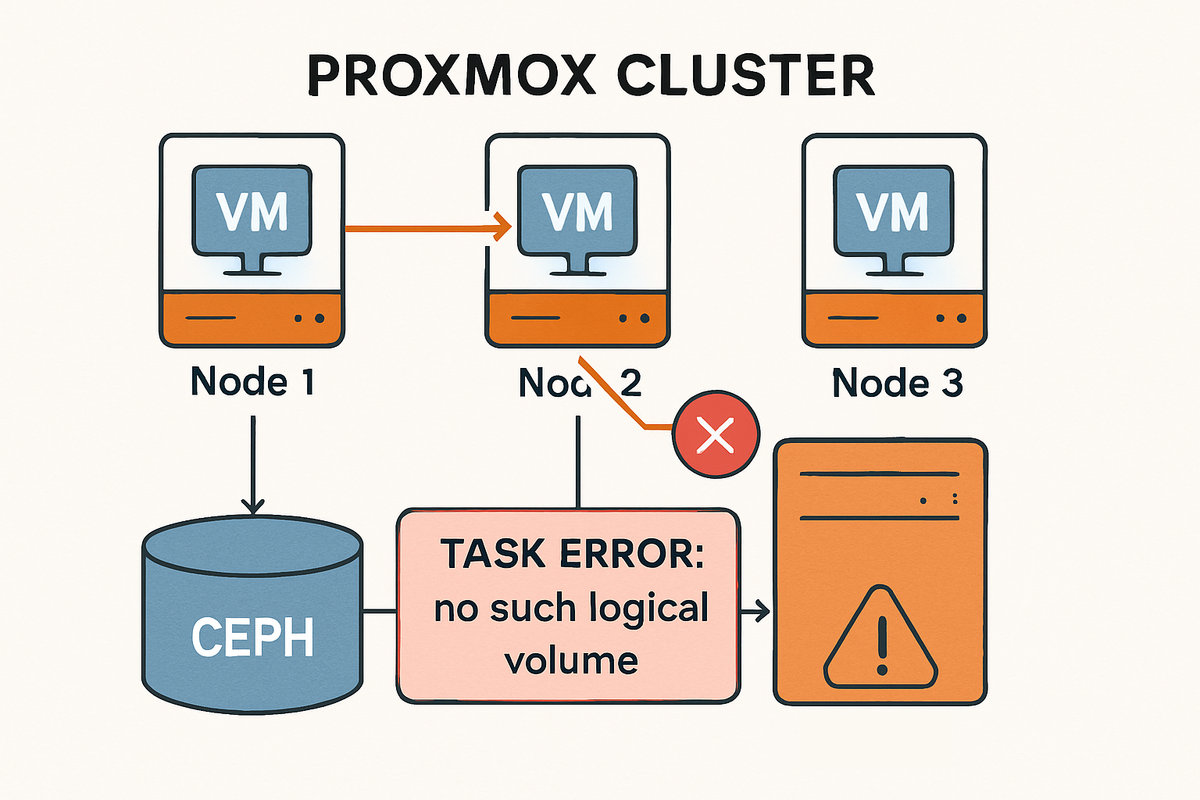
The error means Proxmox couldn’t find the VM’s main disk on the failover node.
I had inadvertently created this VM on local-lvm (node-only storage), so the disk only existed on ryzen1600x(the original host) instead of n100(the host to failover to). Shared HA only works when VM disks reside on storage accessible by every node—in my case, Ceph.
Step-by-step guide to fix the error
Now, let's walkthrough the steps together to fix the error.
Step 0: Disable HA for the VM
When this error presents, it prevents me to even migrate or backup my vm - well, obviously - because the disk is not correct.

So, first thing first, go to Datacenter > HA, look for the vm id, and remove it from HA.

Step 1: Breaking the Error Loop
To reclaim control of my VM:
- SSH into n100(the node where the vm failed to start) node.
- Or access the shell from Proxmox GUI.
- Edit the VM’s configuration file.
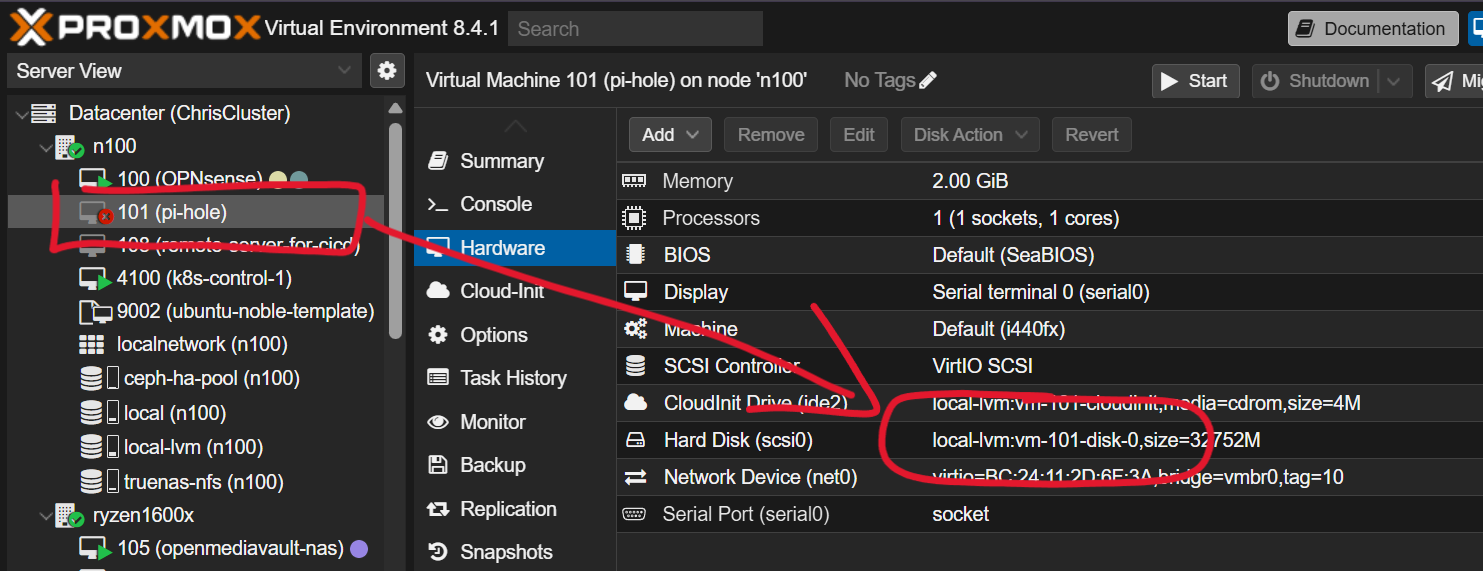
Configuration files are in/etc/pve/qemu-server/named by VMID, e.g.:nano /etc/pve/qemu-server/101.conf - Comment out the problematic disk line (
scsi0).
Example:#scsi0: local-lvm:vm-101-disk-0,size=34304M
This tells Proxmox to ignore the missing disk and allows the Web UI to load without failure.
Do not comment out the ide2 (cloud-init CD-ROM, or other installer disc) unless you also get errors about it. Proxmox can usually regenerate these as needed.
After commenting out the config file, refresh the browser, and you will see the red cross disappeared on your vm, and also the disk.
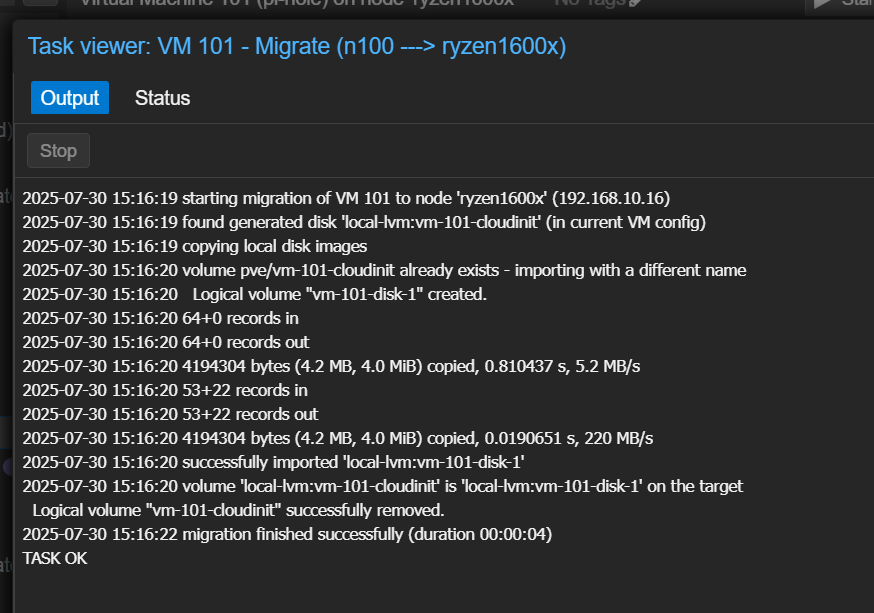
Step 2: Migrate the VM back to it's original node
Now, I can migrate my vm back to where it came from.
Step 3: Attach the Disk
After the migration complete, what we want to do is to uncomment the line we commented out.
- ssh or access the shell of the vm's host. (ryzen1600x in this case)
- Edit the VM’s configuration file.
- Go to the same path
/etc/pve/qemu-server/and look for101.conf
- Go to the same path
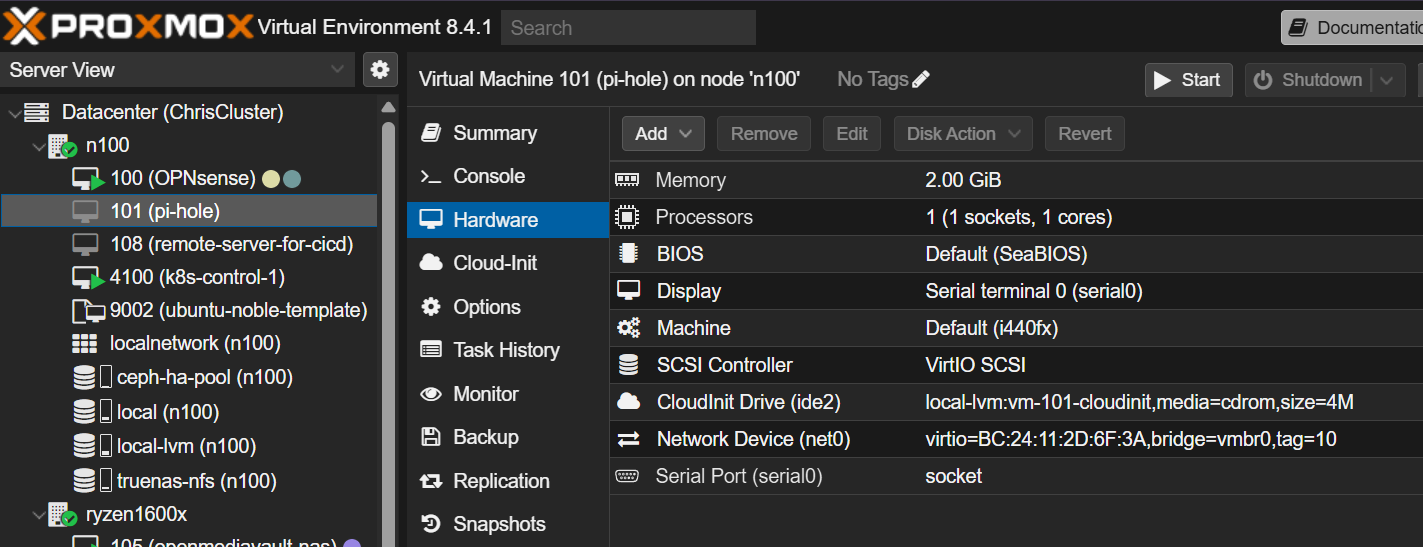
- Look for the line that was commented out and uncomment it.
- It is ussually located on top of the file and is URL encoded.
- e.g.:
#scsi0%3A local-lvm%3Avm-101-disk-0,size=32752M - modify it to:
scsi0: local-lvm:vm-101-disk-0,size=32752M
- e.g.:
- Save and exit.
- It is ussually located on top of the file and is URL encoded.
- Refresh the browser and go back to the VM's Hardware page, you will find your disk attached.

At this point, the vm is able to be started and run normally like before!
However, if the same outage occurs, you will still have the same incident. So let's go and fix the root problem, which is moving the disk to the ceph pool.
Step 4: Fix the Disk Location
Now let's make the VM highly available—migrate the disk to Ceph.
- In the Proxmox web UI:
- Shut down the VM if running.
- Go to the VM’s “Hardware” tab.
- Look for the
local-lvmdisk. (The disk we dealed with before) - Click “Move Disk,” target your Ceph storage pool, and begin migration.
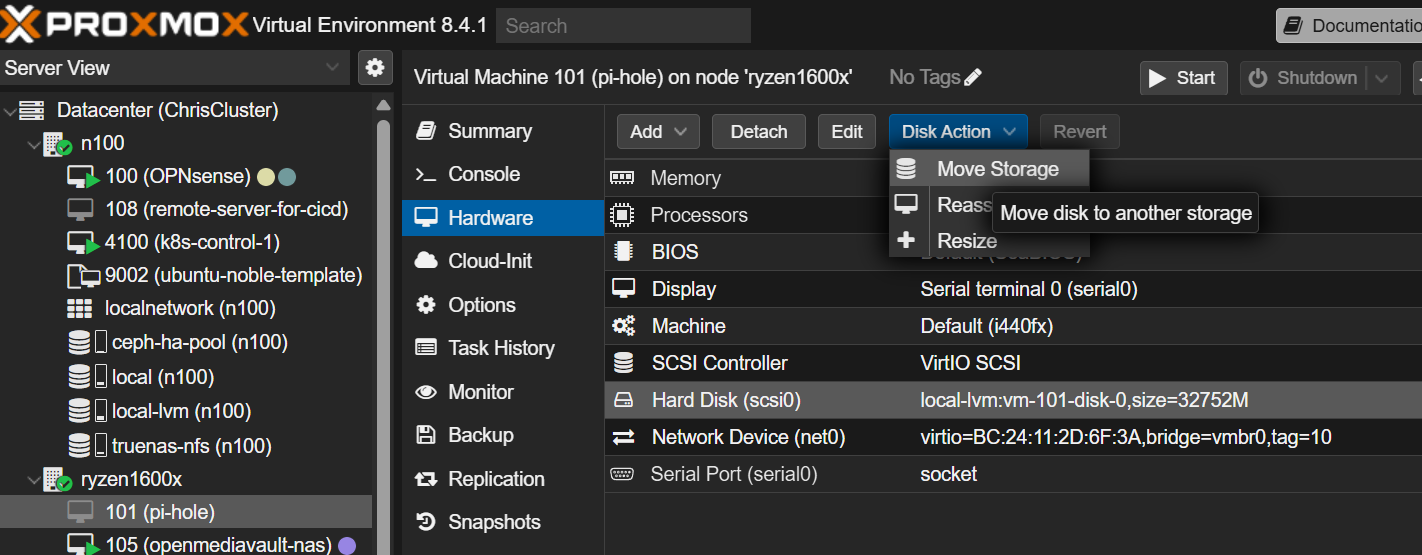
This operation can take a while depending on disk size and network speed.
Step 5: Confirm & Test
- After migration, verify the disk entry now references your Ceph pool.
- Start the VM.
- Test manual migration between nodes—it should now work without errors.
- When satisfied, re-enable HA for this VM.
Summary: Recovery Cheat Sheet
- Comment out missing disk lines in
/etc/pve/qemu-server/VMID.conf - Move disk to shared storage.
- Re-enable disk config.
- Restart VM, test migration, re-enable HA.
Conclusion
Homelab means learning (sometimes the hard way)! Forget to test everything thoroughly will end up in some nasty situation like this.
Hope this helps in someway, and happy homelabing!